The online management software for Presidents and Administrators.
What makes us different from the rest and the software that your administrator has, is that we give you access and full control. You as the president and co-property owner are the one who should have full access to the data.
Your community should have full access to all data and this data should not be held hostage by your Administrator. Well done on taking the first step in taking control.
Your community website is now ready to be used.
NOTE: The Emails facility on your website is on MUTE. No emails will be sent out until you contact us and request activation.
This is a quick guideline so that you can customize and get started with your community website. Your first user login is as a webmaster. With this access level you will always be able see the: Add, Edit, Delete buttons and furthermore you will have access to the control panel and configure website menu, while other users that you setup may not.
However as Webmaster, you will not be able to send a proxy vote, see fees and accounts or add a property for sale or rent. This account is marked as with the tag “tenant” so as to exclude certain rights that property owners get.
NOTE 1: During the signup process, you were asked to specify the number of properties in your urbanization. This number is fixed. If you require more properties to be added then please email support@urbytus.com
NOTE 2: If you can provide us with the property details in a simple excel sheet / CSV file, we are able to import it in one go. There is only a few fields required: Generally, Property Number, Block number, Apt number, Coeficient, Reference number (your accounting ref), Owner’s reference number (if available).
1) Personalize with Photos & Images
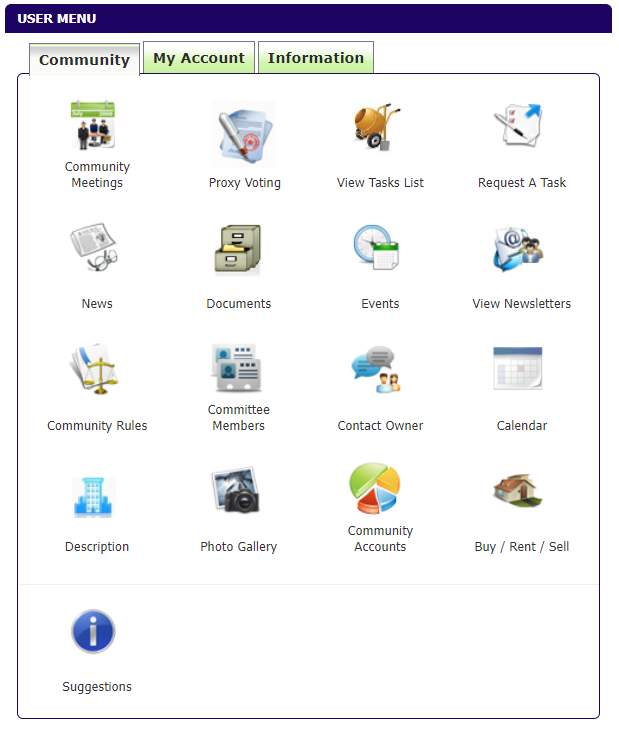
User Menu - Photo Gallery
First we suggest you add a few photos of the community (a minimum of 4). It is easy, you can add more photos. It is also possible to create more groups and add more photos to each group. For example a group for Garden, Swimming Pool, Summer Party, Or General Building and the surrounding area.
First we suggest you add a few photos of the community (a minimum of 4). It is easy, you can add more photos. It is also possible to create more groups and add more photos to each group. For example a group for Garden, Swimming Pool, Summer Party, Or General Building and the surrounding area.
2) Community Meetings.
User Menu - Community Meeting
It is also a good idea to add the date and venue of the next and past Community Meetings. You can add the date & venue of a community meeting in the past or future and specify the type of the meeting. Once you have created the meeting you will see that it appears in the screen as a list. Under each meeting section you will see a button “Add File”. You can upload all the Community Meeting Minutes and related documents.
It is also a good idea to add the date and venue of the next and past Community Meetings. You can add the date & venue of a community meeting in the past or future and specify the type of the meeting. Once you have created the meeting you will see that it appears in the screen as a list. Under each meeting section you will see a button “Add File”. You can upload all the Community Meeting Minutes and related documents.
3) Community Rules
User Menu - Community Rules
You may want to add the Community Rules. You can add each rule one by one or you can add the rules as one or more files. If you add each rule individually the program, will also provide a non official translation (if you selected additional languages). You can always correct and update these translations one by one at a later stage. All auto translations will be marked in red as “Non Official Translation”.
You may want to add the Community Rules. You can add each rule one by one or you can add the rules as one or more files. If you add each rule individually the program, will also provide a non official translation (if you selected additional languages). You can always correct and update these translations one by one at a later stage. All auto translations will be marked in red as “Non Official Translation”.
4) Documents
User Menu - Documents
For other documents you have User Menu - Documents. This is where you can store community contracts, insurance files. The folders are created with multi level access. You can easily create folders that are accessible only by Committee or president.
For other documents you have User Menu - Documents. This is where you can store community contracts, insurance files. The folders are created with multi level access. You can easily create folders that are accessible only by Committee or president.
5) Useful Numbers
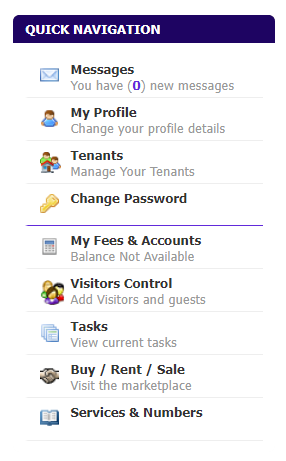
Quick Navigation - Services & Numbers
This is a simple area to add most common numbers. You have three basic options. Contacts, these are like numbers for the Taxi company, Local Police or Town Hall. If you have community staff, you can also add their name and number. Finally you may have a number of recommended service providers. Add them as Community Contacts.
This is a simple area to add most common numbers. You have three basic options. Contacts, these are like numbers for the Taxi company, Local Police or Town Hall. If you have community staff, you can also add their name and number. Finally you may have a number of recommended service providers. Add them as Community Contacts.


1) Personalize with Photos & Images
User Menu - Photo Gallery
First we suggest you add a few photos of the community (a minimum of 4). It is easy, you can add more photos. It is also possible to create more groups and add more photos to each group. For example a group for Garden, Swimming Pool, Summer Party, Or General Building and the surrounding area.
First we suggest you add a few photos of the community (a minimum of 4). It is easy, you can add more photos. It is also possible to create more groups and add more photos to each group. For example a group for Garden, Swimming Pool, Summer Party, Or General Building and the surrounding area.
2) Community Meetings.
User Menu - Community Meeting
It is also a good idea to add the date and venue of the next and past Community Meetings. You can add the date & venue of a community meeting in the past or future and specify the type of the meeting. Once you have created the meeting you will see that it appears in the screen as a list. Under each meeting section you will see a button “Add File”. You can upload all the Community Meeting Minutes and related documents.
It is also a good idea to add the date and venue of the next and past Community Meetings. You can add the date & venue of a community meeting in the past or future and specify the type of the meeting. Once you have created the meeting you will see that it appears in the screen as a list. Under each meeting section you will see a button “Add File”. You can upload all the Community Meeting Minutes and related documents.
3) Community Rules
User Menu - Community Rules
You may want to add the Community Rules. You can add each rule one by one or you can add the rules as one or more files. If you add each rule individually the program, will also provide a non official translation (if you selected additional languages). You can always correct and update these translations one by one at a later stage. All auto translations will be marked in red as “Non Official Translation”.
You may want to add the Community Rules. You can add each rule one by one or you can add the rules as one or more files. If you add each rule individually the program, will also provide a non official translation (if you selected additional languages). You can always correct and update these translations one by one at a later stage. All auto translations will be marked in red as “Non Official Translation”.
4) Documents
User Menu - Documents
For other documents you have User Menu - Documents. This is where you can store community contracts, insurance files. The folders are created with multi level access. You can easily create folders that are accessible only by Committee or president.
For other documents you have User Menu - Documents. This is where you can store community contracts, insurance files. The folders are created with multi level access. You can easily create folders that are accessible only by Committee or president.

5) Useful Numbers
Quick Navigation - Services & Numbers
This is a simple area to add most common numbers. You have three basic options. Contacts, these are like numbers for the Taxi company, Local Police or Town Hall. If you have community staff, you can also add their name and number. Finally you may have a number of recommended service providers. Add them as Community Contacts.
This is a simple area to add most common numbers. You have three basic options. Contacts, these are like numbers for the Taxi company, Local Police or Town Hall. If you have community staff, you can also add their name and number. Finally you may have a number of recommended service providers. Add them as Community Contacts.